These great photographs are for viewing and identification purposes. Many of the photos I find have no reliable link so I am asking viewers to please add a comment and link if they know who took any of the photos. Photos will be removed at artists request. In the meantime enjoy today’s post.
This is an important subject that everyone should be familiar with. As each of these animals go extinct we loose another piece of ourselves. Not as many people care about this subject as should but I wonder if their attitude would change if humans were an endangered species. Of course if that were the case there would be no one to care at all. It will happen soon enough but I would hate to know that there was a more intelligent species that was able to help the human species from becoming extinct and doing anything about it. Unlike humans these animals are doing nothing to actually make themselves disappear. It is man alone doing this to them and in the end to himself.
An endangered species is a population of organisms which is at risk of becoming extinct because it is either few in numbers, or threatened by changing environmental or predation parameters. Many countries have laws that make it illegal to endanger these animals but this only happens for a small % of those that are actually in peril. Most will disappear with no notice or care given. Perhaps we can at least help with the few that have been obtained legal protection.
Learn more about these animals and the efforts to protect them at the WWF
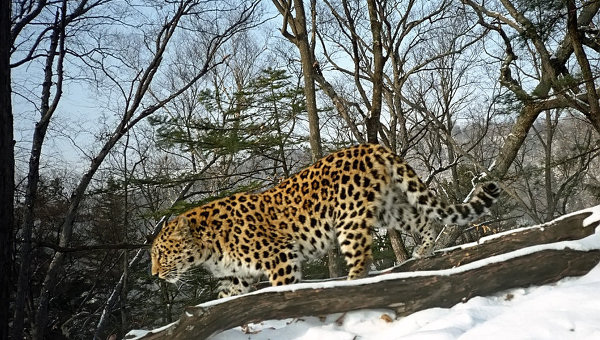
- long term efforts made to support leopard conservation, including this annual survey conducted by WWF and partners
- improvements made to the management of the Kedrovaya Pad Reserve and Leopardovy Federal Wildlife Refuge, both primary habitat for Amur leopards

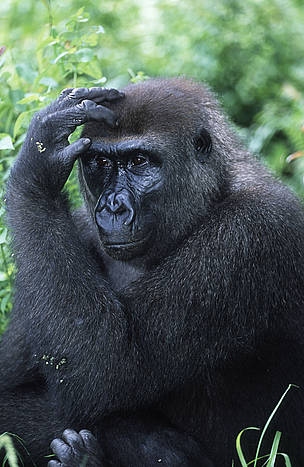
- The western lowland gorilla is the most widespread, possibly numbering 100,000.
- The Cross River gorilla is currently the world’s rarest great ape, with a population of only around 250-300 restricted to a small area of highland forest on the border of Cameroon and Nigeria.
- There is no reliable estimate of the eastern lowland gorilla population; however at one time it could have reached 17,000 individuals.
- The total population of mountain gorillas is around 786 individuals, split into two separate groups.