
How to Make Your Own Videos for FREE Part 1c
The first thing you will need to do is get Google’s Picasa – it is a free photo program that works well with any type of picture not just photos.
Download it at http://picasa.google.com/intl/en/
You can easily load photographs from your camera to Picasa or import saved files to view. My favorite part of acquiring photos from my camera is Picasa gives you the option to erase from your camera all the photos you are putting on you computer. This saves me time having to delete photos from my camera. There is an area where you can make collages which is one of the things I do for parts of my photo videos. You can make a mosaic, a picture pile, a framed mosaic, a grid or a contact sheet, so your options are pretty good.
~~~~~~~~~~~~~~~~~~~~~~~~
PART 1c
This article will cover those last available options working with collage in Picasa. If you read part one and two you should be quite familiar with this part of the program. Once you are working with it all of these parts will come rather easy to you. The best part of it now is that you can experiment with your own photos and have some fun.
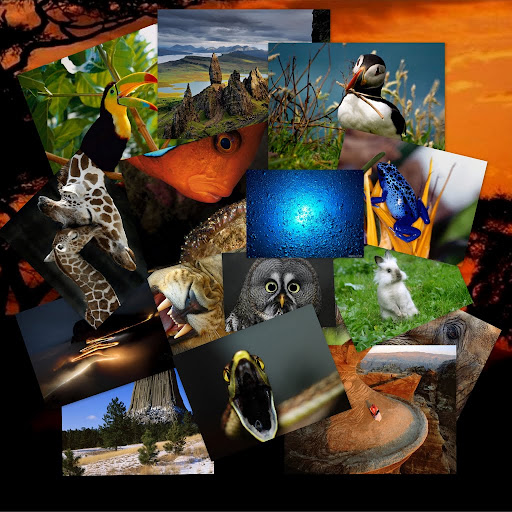
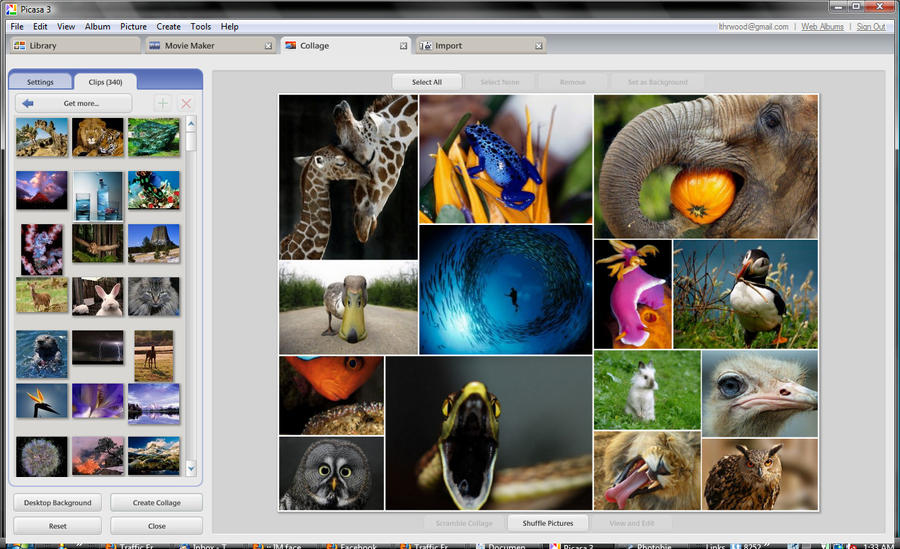
First is Grid: Arrange pictures into regular rows and columns
Below is the menu bar you will see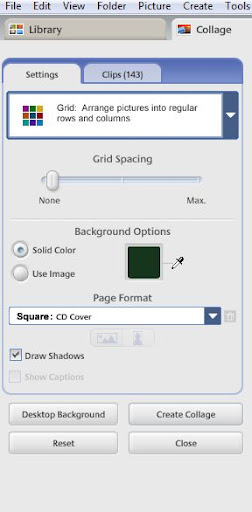
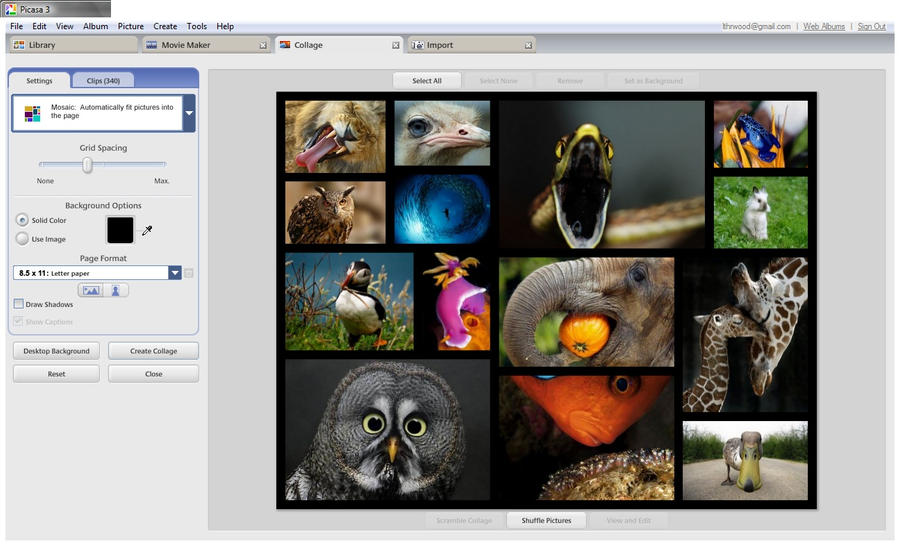
In the next image I used the following settings – grid spacing (just a little) if you use no spacing at all the photos lack individuality. They run into each other but with a tiny bit of a grid you get each to stand out. The grid is set at a solid color and that color is black.
I used draw shadows because that adds just the slightest bit of depth to the images. You can try with it on and off to see the difference and choose which you prefer.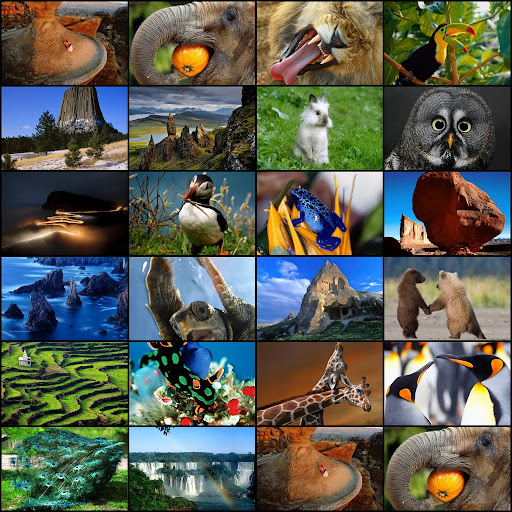
In the next image I scrambled the photos and used a bigger grid.
Everything else is set the same.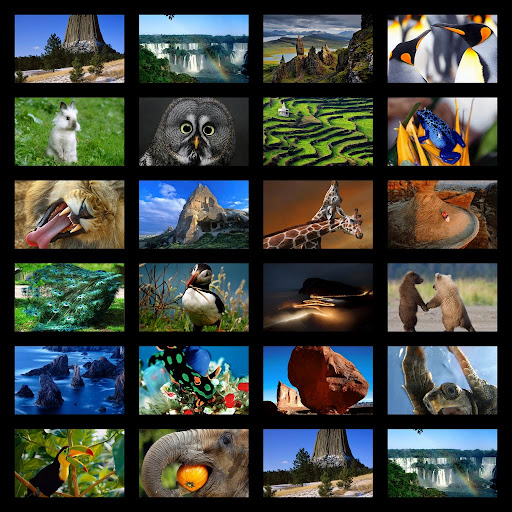
After you are happy with your creation hit save collage. Remember you can always edit at a later time.
The last of the options under collage is
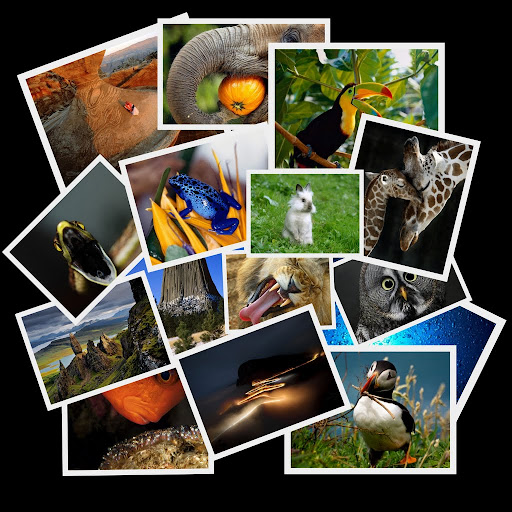
Contact Sheet: Thumbnails with an informative header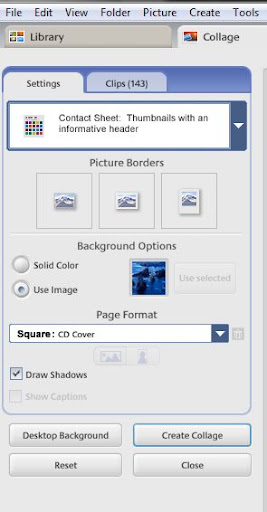
In the image below the following settings were used.
There are three options for frames – I used the center one to add small frames. The frame color can not be changed it is always white.
With this option the amount of space between your photos is done automatically by the program. The more photos you add the less space. I used a photo for the background but you can set it to be a solid color of your choice. There is a color picker so you can choose a color in one of the photos and by holding it over the color you want and clicking it you will get that color instantly. No guessing. Again I added the Draw Shadows option for debth, you can play with this to see if you want it on or off. There is not a big difference when you use this but it does add to the image.
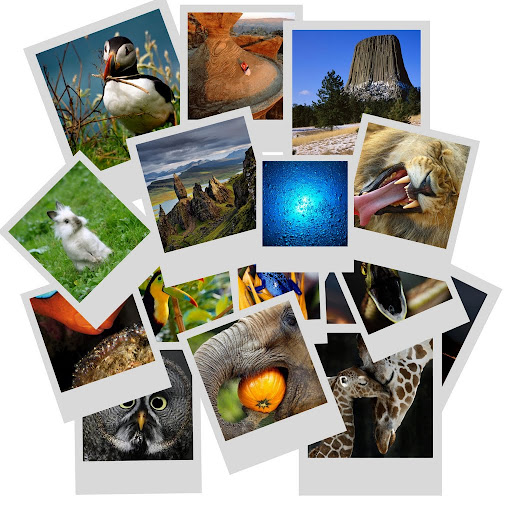
In the next image I used the third option for the photo frames – polaroid. I set the background to a solid color – in this case I use the color picker over the grass of the photo with the bunny rabbit. The draw shadows is on.
I never did find a way to change the title and/or information on the contact sheet. The program chooses what you see. I will start with the ‘Create Movie Presentation’ in my next article. I discovered while putting together a video “The Beauty of Nature” that this is not the only program I have used.
I do hope to cover the Picasa program and then try and give some pointers on ‘Windows Movie Maker’ program.
If there are any questions regarding this program you would like me to cover just message me.
Marisa Horn
How to Make Your Own Videos for FREE Part 1b
For more articles in this series visit my Faceplate
The first thing you will need to do is get Google’s Picasa – it is a free photo program that works well with any type of picture not just photos.
Download it at http://picasa.google.com/intl/en/
You can easily load photographs from your camera to Picasa or import saved files to view. My favorite part of acquiring photos from my camera is Picasa gives you the option to erase from your camera all the photos you are putting on you computer. This saves me time having to delete photos from my camera. There is an area where you can make collages which is one of the things I do for parts of my photo videos. You can make a mosaic, a picture pile, a framed mosaic, a grid or a contact sheet, so your options are pretty good.
~~~~~~~~~~~~~~~~~~~~~~~~
PART 1b
This part of the article covers the second option in collage when using Picasa.
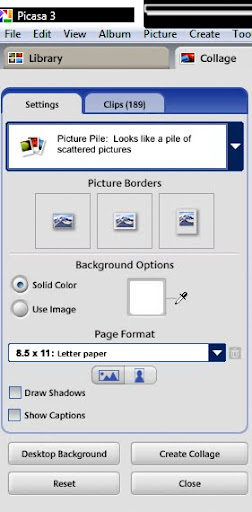
Picture Pile – it makes your photos or images look like a scattered pile of pictures
Just like with the mosaic you have a host of neat options to choose from to make it look exactly like you want.
This is the menu for Picture Pile under Collage in Picasa. Using the different options you have the ability to do a whole host of great things in order to make a fine looking image.
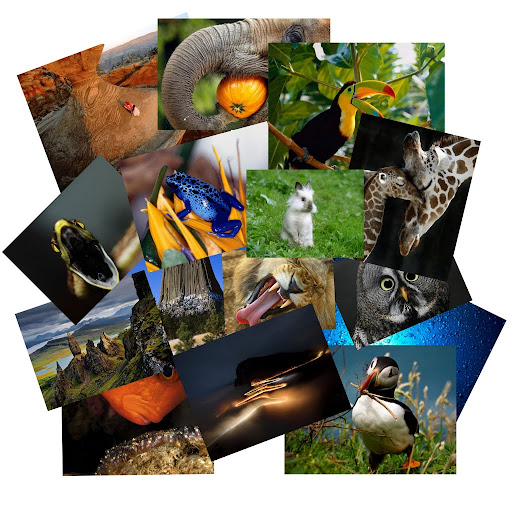
I am using many of the same photos as I did in part 1.
- select the picture borders – I have it set at none or just a picture without a border.
- select background option – I have chosen white.
- set the page format to what you currently need – in this case it is 8.5 x 11
- you can also set how you want you page to lie – landscape or portrait – this is landscape
The Draw Shadows and Show Captions will be discussed at a later time and the last four buttons are what you choose after you have completed your work.
Important to know – once you save the collage you are always able to edit it. 🙂
There is also an option to custom set the page size to whatever you like. I am not sure of what size will be best for a video presentation because I never actually thought about it. My thoughts are square.
If you look at this video I made you will see that the black is not solid in some of the frames and I am not sure if I had the background set at a dark gray or it is because the size of the images were not square. I will let you know at a later date my findings about the sizes.
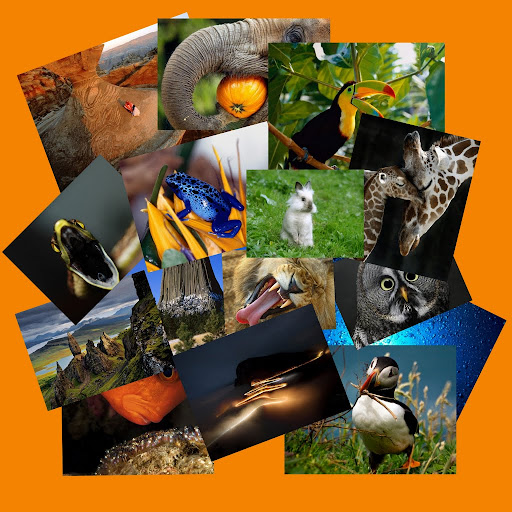
The following image has only one change and that is the background color. You can choose from colors on the graph or use the dropper to choose a color from the photos on the collage. In this case the color was taken from the pumpkin in the elephants mouth.
Changes in the next image include
- select the picture borders – I have it set at none
- select background option – I have chosen picture – you can select anyone of the photos to use as your background
- set the page format to what you currently need – in this case it is 8.5 x 11
- you can also set how you want you page to lie – landscape or portrait
- Drop Shadow is set
- I have shuffled the pictures

In the next image note you can not see the photo used for the background that is because after setting it for the background I moved it to the back of the pile. In order to be used as a background it has to be in the collage so you have to bury it under the pile and if it still shows use the manual features to make it as small as needed.
I just figured this out, if you want to resize, angle or re-position all the photos at one time select all and the too appears on top of the photos to do any or all of these..
Changes in the next image include
- select the picture borders – I have it set at plain white border
- select background option – I have chosen black
- set the page format to what you currently need – in this case it is 8.5 x 11
- you can also set how you want you page to lie – landscape or portrait
Changes in the next image include
- select the picture borders – I have it set at instant camera
- select background option – I have chosen white
- set the page format to what you currently need – in this case it is 8.5 x 11
- you can also set how you want you page to lie – landscape or portrait
I also scrambled the collage and shuffled the pictures. You can also change the position, size and angle of each photo manually. There are excellent and user friendly tools that can be used by simply clicking on the photo. There is also a drop down menu when you click on an image that allows you to bring the photo to the front of the pile or to the back. This way if you like where a photo is but it is covered by part of another one you can just bring it to the front. This is very easy to do but beware, once you start doing it you may find that you are a perfectionist. Before you know it you have been up all night … 🙂
When you are satisfied with your creation just click on ‘create colloge’ and it will be saved into your picasa library. You can also click on ‘desktoop background’ to make it your newest desktop image.
I will discuss the other parts of the collage maker next in our adventure on how to make or set up free videos.
If you have downloaded this program and are working along with these articles please message me with any questions I have not covered.
Marisa Horn
Youtube videos done with Picasa and windows movie maker
http://www.youtube.com/user/lthrwood
http://www.youtube.com/user/lthrwood
In my spare time here is how I make cash
Wake Me Up When September Ends – Green Day WAKE UP
Beautiful photographs to promote animal and ecological awareness. This video was put to the fine music of Green Day, the song Wake Me Up When September Ends.
Some of the photos are my own but many are from various artist over the net. I did not know I would be using them and therefore am not certain who the original photographers are. I will add credits here to anyone who owns one of these amazing photos and sends me their information including a link to where it is displayed. This is a non profit piece made to heighten the awareness of our beautiful planet and we must remembered that even when we do not see these things they are there for everyone of us. Unfortunately on an hourly basis more and more of this irreplaceable beauty is eradicated by mans hand. I sincerely hope that none of the artists who’s work is included here find any copyright infringement that will allow YouTube to pull this piece. The planet needs to be represented.
Thank you
How to Make Your Own Videos for FREE part 1
Someone asked me the other day how I put together my videos. I never even thought that I might know something that some marketers might be interested in knowing. I am going to try and cover the steps needed to put together a free and professional looking video that you can share on Youtube or wherever you may want to use it.
The first thing you will need to do is get Googles Picasa – it is a free photo program that works well with any type of picture not just photos.
Download it at http://picasa.google.com/intl/en/
The first option is mosaic which can be a lot of fun for you to work with and give you different ways to put your photos together. If you have a bunch of photos or images you would like to show on one frame of your video this is a great way to set them up. You will get the option of putting a grid between the photos and you can pick the color and the size you want the grid to be. When you have your pics in the grid they are easy to remove and replace and you have a shuffle button. This allows you to choose where you want the photos to display. I just figured this out about the shuffle – the program picks a layout and each time you hit shuffle it move the photos to a different space. Once all your photos have been shown in different areas the computer gives you a new grid.
The image below is with the same photos as the first one. The grid is black and wider and the photos have been shuffled.
adventure on how to make or set up free videos.
Youtube done with Picasa
http://www.youtube.com/user/lthrwood
—
The Death of Common Sense
Obituary printed in the London Times
Interesting and sadly rather true.
Today we mourn the passing of a beloved old friend, Common Sense, who has been with us for many years. No one knows for sure how old he was, since his birth records were long ago lost in bureaucratic red tape.
He will be remembered as having cultivated such valuable lessons as:
– Knowing when to come in out of the rain;
– Why the early bird gets the worm;
– Life isn’t always fair;
– and maybe it was my fault.
Common Sense lived by simple, sound financial policies (don’t spend more than you can earn) and reliable strategies (adults, not children, are in charge).
His health began to deteriorate rapidly when well-intentioned but overbearing regulations were set in place. Reports of a 6-year-old boy charged with sexual harassment for kissing a classmate; teens suspended from school for using mouthwash after lunch; and a teacher fired for reprimanding an unruly student, only worsened his condition.
Common Sense lost ground when parents attacked teachers for doing the job that they themselves had failed to do in disciplining their unruly children. It declined even further when schools were required to get parental consent to administer sun lotion or an aspirin to a student; but could not inform parents when a student became pregnant and wanted to have an abortion.
Common Sense lost the will to live as the churches became businesses; and criminals received better treatment than their victims. Common Sense took a beating when you couldn’t defend yourself from a burglar in your own home and the burglar could sue you for assault.
Common Sense finally gave up the will to live, after a woman failed to realize that a steaming cup of coffee was hot. She spilled a little in her lap, and was promptly awarded a huge settlement.
Common Sense was preceded in death, by his parents, Truth and Trust, by his wife, Discretion, by his daughter, Responsibility, and by his son, Reason.
He is survived by his 4 stepbrothers;
I Know My Rights,
I Want It Now,
Someone Else Is To Blame,
and I’m A Victim
Not many attended his funeral because so few realized he was gone.