
The first thing you will need to do is get Google’s Picasa – it is a free photo program that works well with any type of picture not just photos.
Download it at http://picasa.google.com/intl/en/
You can easily load photographs from your camera to Picasa or import saved files to view. My favorite part of acquiring photos from my camera is Picasa gives you the option to erase from your camera all the photos you are putting on you computer. This saves me time having to delete photos from my camera. There is an area where you can make collages which is one of the things I do for parts of my photo videos. You can make a mosaic, a picture pile, a framed mosaic, a grid or a contact sheet, so your options are pretty good.
~~~~~~~~~~~~~~~~~~~~~~~~
PART 2a
This article will cover how to set up your program files to make your video.
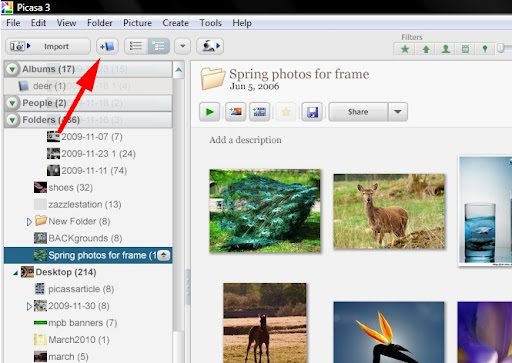
– What you will want to do is start a new album for your video. Since I have photos already in my program that I am using the easiest way to start this album is to locate where many of the photos are. In my case they are in the “Spring photos for frame” file. You will see this in the next image.
– Next click on the icon at the top of the page to create a new album. You should have no trouble finding these icons because when your cursor hoovers over them the text for each shows up. Below I added an arrow to show you exactly where this icon is. When you click on the icon a small window will come up. I was not able to make a copy of this window. There are a few boxes you can fill in:
The name you want to use ( I used ‘How to Movie’ )
Today’s date will be there automatically
There are a few other things like description and music choice but all can be done later.
– After you finish with creating the album go back to where your photos are located. Find a photo you want to include and right click on it. A menu will appear with a long assortment of options. Hoover over the second one ‘add to album’ another menu will open with any albums you already have. Click on the album you just made for your movie. Repeat this for all the photos you want to use or go to the next step. I recommend not putting in many photos just yet.
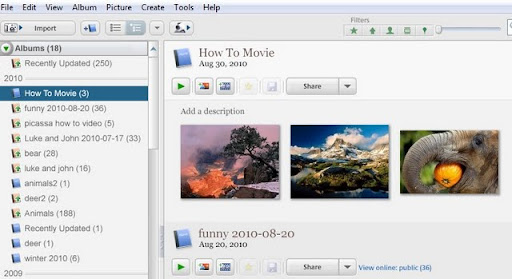
– Find your album (‘How to Movie’ in my case) in the left menu bar. It should be at the top above your photos listed. High litght it and the photos you have already saved to it will show in the display area. As you can see in the image below I saved three photos in mine.
Now you are ready to start making a movie.
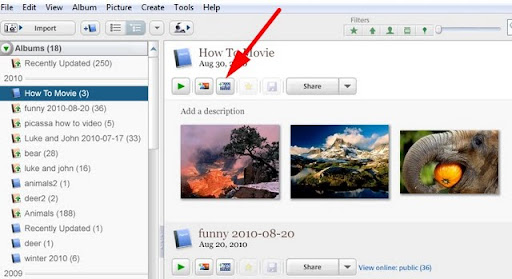
– Above the photos in the display area click on the ‘create movie presentation icon’ shown in the next image.
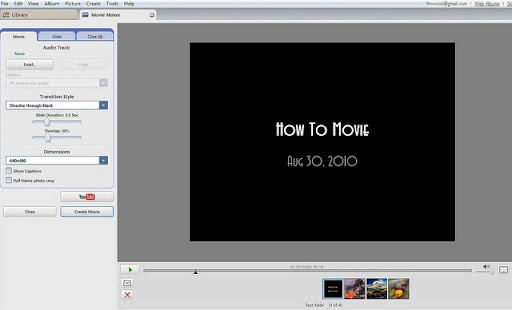
The next screen that opens is where you will be creating your movie. The name of your album will show up as the title and the photos you have already entered into your album will show in the time line.
You can start a movie from any file you already have in Picasa but then you will have to change more in the next area. I was going to start with the file holding all the ‘Spring photos for frame’ photos but then I would have to delete over 100 of them from the time line.
Below is an image of the menu bar you will now be working with.
Movie Maker

I will discuss the movie maker further, starting with how to add and design your title in the next article.
If you have downloaded this program and are working along with these articles please message me with any questions I have not covered.
Marisa Horn
a/k/a kashmier
Youtube videos done with Picasa and windows movie maker
http://www.youtube.com/user/lthrwood
http://www.youtube.com/user/lthrwood